PCB intelligent visual inspection, improve production efficiency
Visual inspection machine refers to equipment or machines that comply with European standards and regulations and are used for visual inspection. It is designed to detect product surface features, defects, dimensions, etc., and ensure that products meet quality standards and production requirements. In the design, manufacturing and sales process, we need to comply with the relevant European regulations and standards to ensure the compliance, safety and quality of the equipment. Contribute to the free circulation of products and market acceptance.
Visual inspection Eurogauge equipment function
Product inspection and defect identification: the visual inspection machine can carry out a comprehensive inspection of the product to identify surface defects, foreign bodies, cracks, deformation and other problems to ensure that the product quality meets the standard.
Size measurement: Through cameras and image processing technology, the visual inspection machine can accurately measure the size and shape of the product and check whether the product meets the specifications.
Text and image recognition: Visual inspection equipment can recognize the text, pattern or logo on the product to ensure that the product identification is correct and complete.
Color detection: Visual detection machine can carry out color detection to ensure product color consistency, suitable for industries requiring color consistency.
Classification and sorting: According to the characteristics of the product, the visual inspection machine can classify and sort the product, improving the efficiency and accuracy of the production line.
Defect classification: According to the test results, the product defects are classified according to the severity.
Automated inspection: The visual inspection machine supports automated inspection, reduces human intervention, and improves detection efficiency and consistency.
Data recording and analysis: the visual inspection machine can record test results and data, achieve data analysis, statistics and reporting, optimize production processes and quality control.
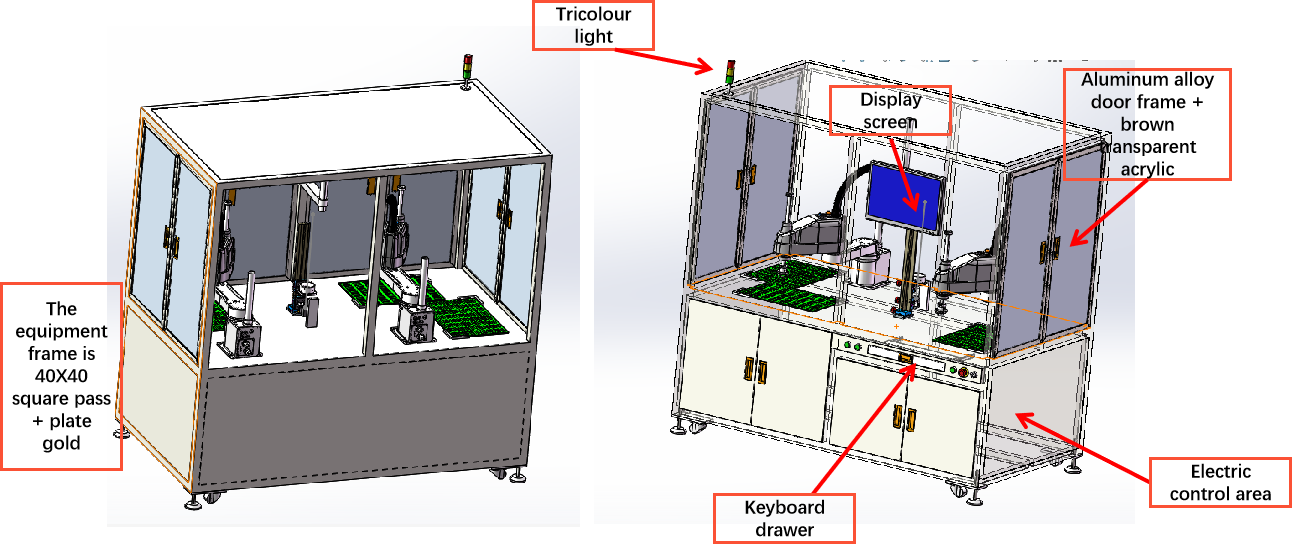
Equipment composition


Working principle
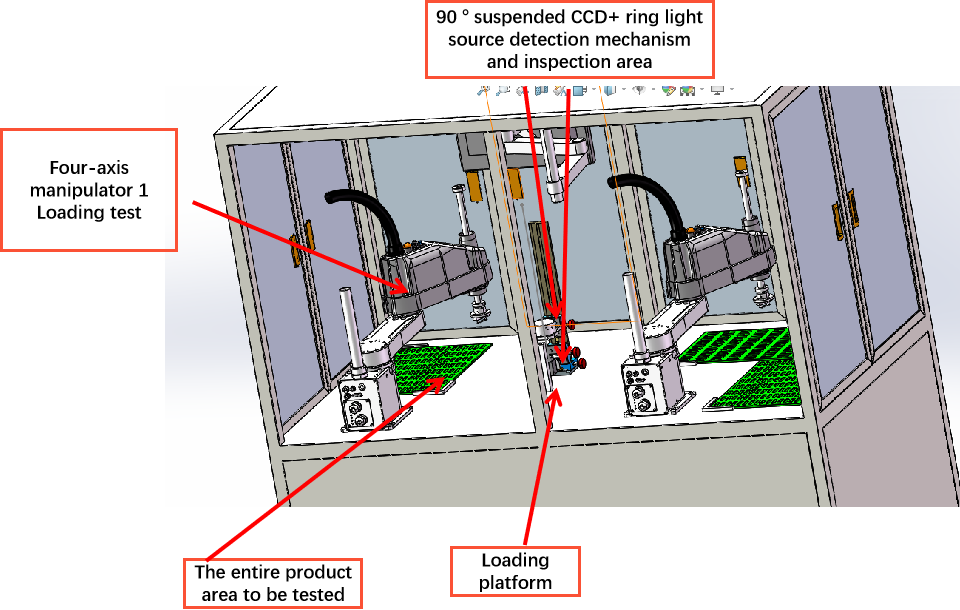
1. The four-axis manipulator 1 sends the product to the 90-degree CCD designated detection area for detection, and starts the detection at the same time according to the signal prompt. After the detection is completed, the tested product is placed on the loading platform and a group of 90 degrees is started according to the signal.
2. The four-axis mechanism hands 2 to the loading platform to pick up the tested products, according to the test results fed back by the system, automatically arrange the plate, good products are placed in the OK product plate, bad products are placed in the NG product plate
3. Repeat the preceding steps

Detected object
A PCB is a substrate used to support and connect electronic components, usually made of insulating material covered with conductive lines for the transmission of electrical and electrical signals in electronic devices.
PCB in the manufacturing process, the size deviation of some products exceeds the design specification, and manual inspection can not ensure the accuracy and stability of the product. The customer has a high requirement for testing efficiency, and the number of tests per minute is not less than 60 pieces. To solve this problem, we provide backlight detection methods and visual detection equipment to solve customers' problems.
Detection effect
Top backlight detection artwork

Top backlight detection analysis diagram

Top backlight detection artwork

Top backlight detection analysis diagram

Top backlight detection analysis diagram

Top backlight detection analysis diagram

-
Service hotline
13077808017


